Angel Tip Nails: A Stunning Way to Achieve Elegant, Classic Manicures
Introduction
Are you ready to elevate your manicure game? Tired of the same old nail designs? Then prepare to be captivated by the ethereal beauty of angel tip nails! This stunning trend blends the classic elegance of French tips with a modern, angelic twist, creating a look that’s both chic and surprisingly easy to achieve. Whether you’re a seasoned nail art pro or a complete beginner, this guide will walk you through everything you need to know to master this heavenly manicure.
What Are Angel Tip Nails?
Angel tip nails are a captivating nail art style characterized by a subtle, almost ethereal, tip that’s reminiscent of an angel’s wing. Unlike traditional French manicures which use a crisp white line, angel tip nails feature a softer, more diffused gradient or a sheer, milky white that creates a dreamy, romantic effect. The transition from the natural nail color to the tip is often more blurred and less defined, making it a softer and more versatile alternative to the classic French manicure. This understated elegance makes angel tip nails perfect for any occasion, from a casual daytime look to a sophisticated evening event.
Beginner’s Guide to Angel Tip Nails
The beauty of angel tip nails lies in their versatility. They can be achieved with a variety of techniques and products, making them accessible to novices and experts alike. For beginners, a simple approach using a nail art brush and sheer white or nude polish is recommended. Don’t worry about perfection; the slightly imperfect, slightly diffused look is part of the charm! Start by applying a base coat, then carefully paint a thin, slightly uneven line along the tip of your nail. Blend the edges with a clean brush for a soft, feathered effect. Top with a clear coat for a glossy finish and admire your stunning angel tip nails!
Nail Prep Checklist
Before you dive into creating your angel tip nails, proper preparation is key! Here’s your checklist:
- 💅 Clean nails: Remove any old polish and gently push back your cuticles.
- ✨ Shape your nails: File them to your desired shape—almond, oval, or square—for a neat, polished look.
- 🧴 Base coat: Apply a thin layer of base coat to protect your nails and create a smooth surface.
- 🎨 Nail polish: Choose your base color and a sheer white or nude polish for the tips.
- 🖌️ Nail art brush (fine detail): A thin brush will give you the best control for creating the delicate angel tip.
- ✨ Top coat: A top coat seals in your design and adds shine.
How to Create Angel Tip Nails – Step-by-Step
Step 1: Prepare Your Nails
Follow the nail prep checklist above. Ensure your nails are clean, shaped, and ready for the mani.
Step 2: Apply Base Coat
Apply a single thin layer of your chosen base coat color. Let it dry completely before moving to the next step.
Step 3: Apply the Angel Tip
Using your fine-detail nail art brush, paint a delicate, slightly uneven line along the tip of your nail. Don’t worry about making it perfect! This slightly imperfect look adds to the ethereal charm of angel tip nails. Remember to leave some space between the tip and your cuticle.
Step 4: Blend the Edges
Using a clean nail art brush or a makeup sponge, gently blend the edges of the tip to create a soft, diffused look. This is what gives angel tip nails their unique, angelic feel.
Step 5: Apply Top Coat
Finish with a top coat to protect your angel tip nails and add a beautiful shine.
Best Practices & Expert Tips
- For a more intense white tip, use two thin coats of your sheer white polish.
- Experiment with different shades of nude or pastel polish for a unique twist, creating a beautiful range from subtle to more pronounced.
- Use a striping tape for a more precise application if you’re aiming for a neater look; however, remember the slightly imperfect nature of angel tip nails is delightful.
- For a longer-lasting manicure, use a durable gel polish.
List of Trending Nail Shapes for Angel Tip Nails
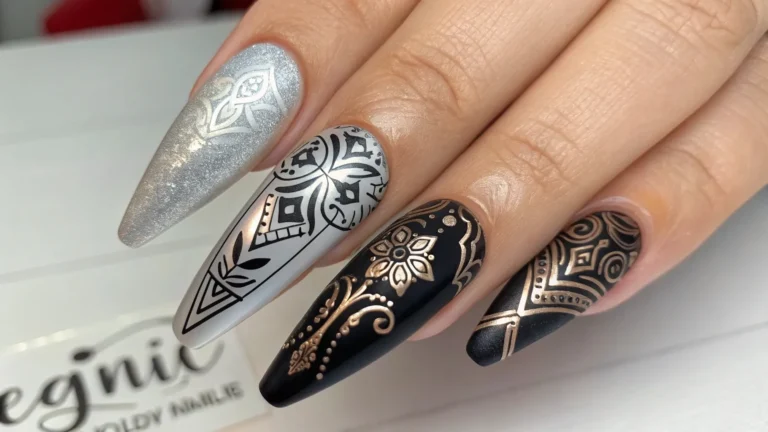
Angel nails, French tips, elegant nail designs look stunning on various nail shapes:
- Almond
- Oval
- Square
- Coffin
- Stiletto (for more adventurous nail enthusiasts!)
FAQs About Angel Tip Nails
Q: Can I do angel tip nails at home?
A: Absolutely! This nail art style is surprisingly easy to achieve at home with a little practice.
Q: What type of polish is best for angel tip nails?
A: Sheer white or nude polishes work best for creating that ethereal, diffused look. Gel polishes will make your manicure last even longer.
Q: How long do angel tip nails last?
A: This depends on the type of polish used. Regular polishes will typically last a week, while gel polishes could last up to two or three.
Q: What if I make a mistake?
A: Don’t worry! The slightly imperfect nature of angel tip nails makes minor imperfections less noticeable. Simply use nail polish remover to clean up any mistakes and start again.
Conclusion
Angel tip nails are the perfect choice for anyone seeking a chic, elegant, and effortlessly stylish manicure. Their subtle beauty and ease of application make them a great option for beginners and nail art veterans alike. So, gather your supplies, follow these steps, and prepare to unleash your inner nail artist! Share your stunning creations with us in the comments below and don’t forget to pin this post for later! And explore more nail art inspiration on our site!


