Nail Buffer Block: How to Achieve the Perfect Smooth Nail Surface
Table of Contents
Want flawlessly smooth nails that are ready for stunning nail art or a perfect polish application? Then you need to master the art of using a nail buffer block. This essential nail care tools, nail smoothers, buffing block is your secret weapon for achieving a professional salon-quality finish at home. Let’s dive in!
What Is a Nail Buffer Block?
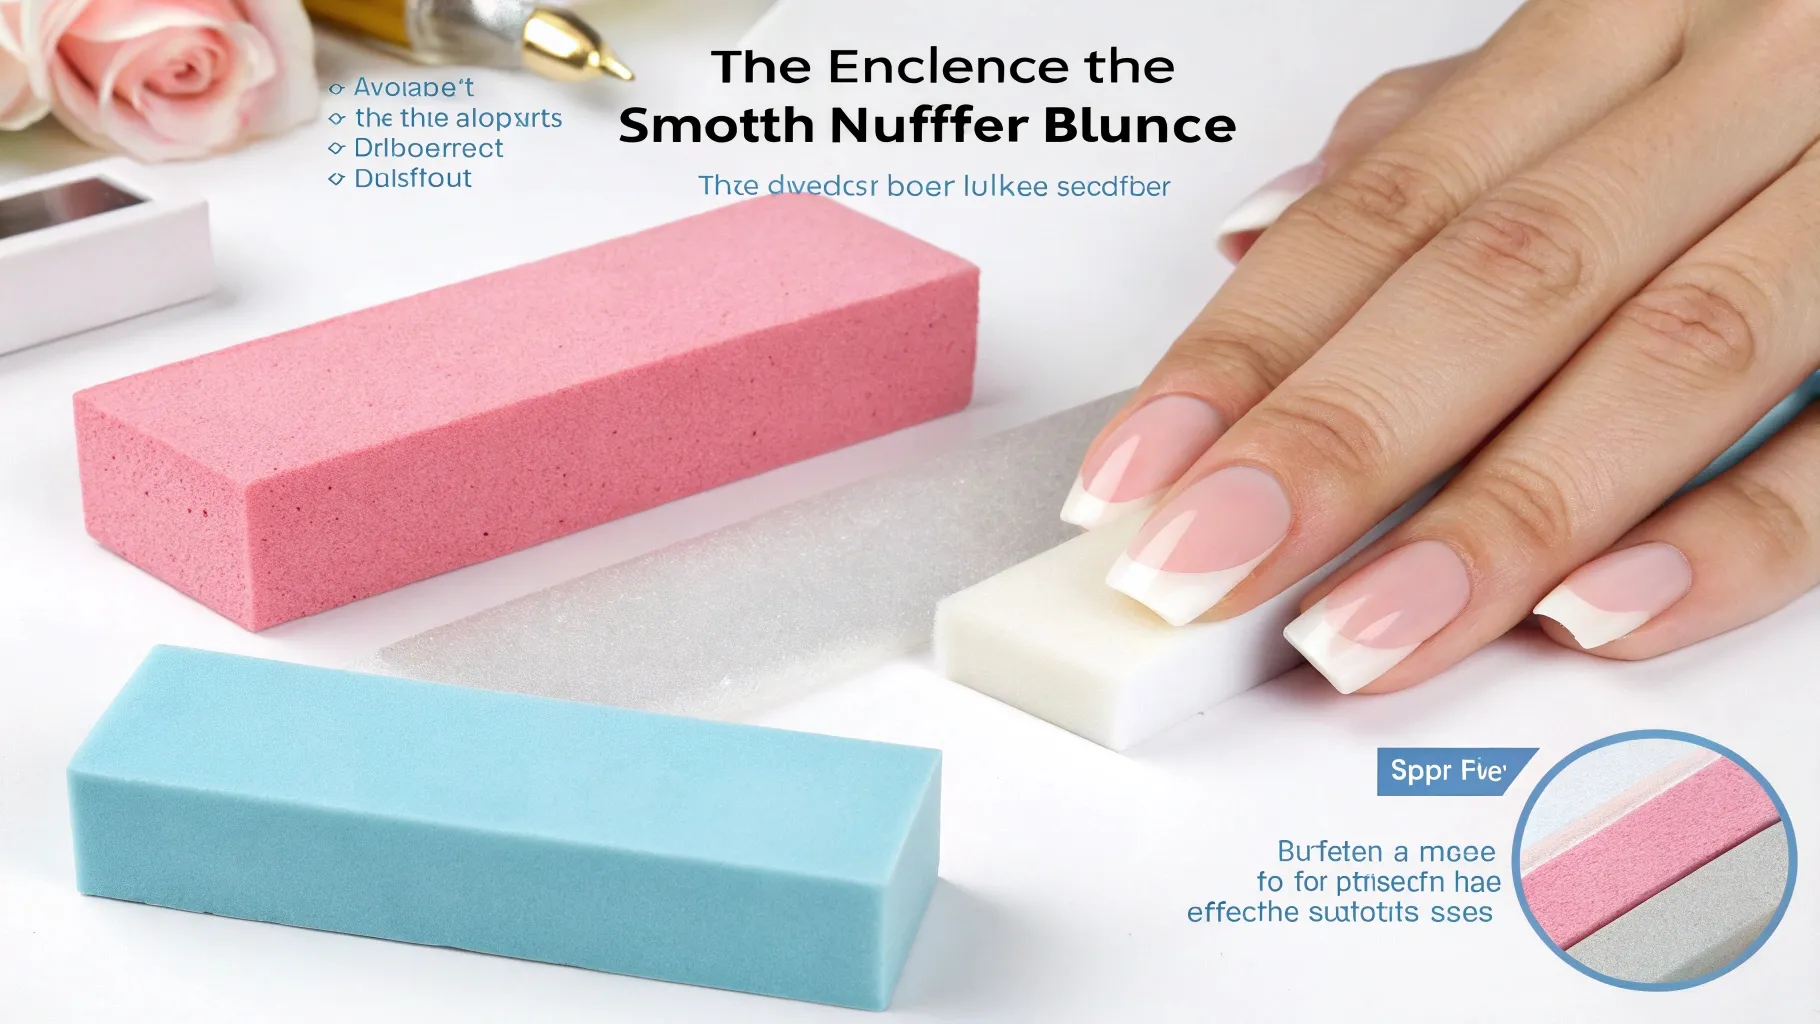
A nail buffer block is a multi-faceted tool used to smooth and even out the nail surface. Unlike harsh methods like filing that can thin the nail, a buffer block gently refines the texture, creating a flawless base for polish or nail art. It’s typically made of fine-grit materials like foam or emery board, offering varying degrees of abrasiveness for different nail needs. Many blocks feature multiple sides, each with a different grit, allowing for controlled smoothing and polishing. The result is stronger, healthier-looking nails that are less prone to chipping and peeling.
Beginner’s Guide to a Nail Buffer Block
Using a nail buffer block is surprisingly easy, even for beginners. The goal is to create a smooth, even surface without over-buffing and damaging your nails. Remember that less is more! Start with the coarser side only if necessary (for example, removing ridges), gently moving the buffer across the nail in one direction. Avoid harsh back-and-forth movements. For a subtle shine, you can use the buffer on its own – but for a truly polished effect, follow it up with a nail polisher. There’s a common misconception that all buffer blocks are created equal; however, understanding the different grits on various sides will help you maximize the effectiveness and minimize the risk of damage.
Nail Prep Checklist
Before you grab your nail buffer block, ensure you’ve prepared your nails correctly. This simple checklist will help:
- 💅 Remove any old nail polish with a gentle non-acetone remover.
- 🧼 Wash and dry your hands thoroughly.
- 🧴 Apply a cuticle oil to soften cuticles (optional, but recommended).
- 🧽 Gently push back your cuticles with a cuticle pusher. Avoid cutting your cuticles.
How to Use a Nail Buffer Block – Step-by-Step
Here’s a step-by-step guide to flawlessly buffing your nails:
Step 1: Assess Your Nails
Examine your nails closely. Do you have significant ridges, bumps, or imperfections? Or just slight unevenness? Choose the proper grit for the task. Typically, a finer grit is used at the beginning stages.
Step 2: Start with the Coarsest Grit (If Necessary)
If your nails have significant ridges, gently use the coarsest side of the nail buffer block to smooth them out. Work in short, gentle strokes in one direction—avoid sawing back and forth.
Step 3: Move to a Finer Grit
Once the larger imperfections are removed (if any), switch to a finer grit side to further refine the surface. Continue working in gentle, unidirectional strokes. Be mindful not to over-buff.
Step 4: Use the Smoothing/Polishing Side
Next, use the smoothest side of your nail buffer block. This side creates a beautiful shine and prepares your nails for polish.
Step 5: Apply Nail Polish (Optional)
After buffing, you can apply a base coat, nail polish, and top coat for an even more professional look.
Best Practices & Expert Tips
- Less is more: Avoid over-buffing, which can weaken your nails.
- Light pressure: Apply gentle pressure when buffing.
- One direction: Always move the buffer in one direction to prevent damage.
- Regular maintenance: Buff your nails once a week or as needed.
- Clean your buffer: Regularly clean your nail buffer block to remove dust and debris.
List of Essential Nail Care Tools
This section explores the importance of having a comprehensive nail care kit. Don’t just rely on the nail buffer block; a well-rounded toolkit is crucial for healthy and beautiful nails. Beyond the nail care tools, nail smoothers, buffing block, here is a list of other useful nail care tools, nail smoothers, buffing block:
- Cuticle pusher
- Cuticle nippers (use with caution!)
- Nail clippers
- Nail file
- Cuticle oil
- Nail polish remover
FAQs About Nail Buffer Blocks
- Q: How often should I buff my nails? A: Once a week is generally sufficient, but you can buff more frequently if needed.
- Q: Can I use a nail buffer block on artificial nails? A: Yes, but use it more gently as artificial nails can be more delicate.
- Q: Does buffing damage my nails? A: Over-buffing or using too much pressure can damage your nails; if done correctly it’s fine with regular use.
- Q: What type of nail buffer block should I buy? A: It all depends on preference for how often your nails need this and the type of nails you have. Check reviews for tips.
- Q: My nails are still rough after buffing. What should I do? A: You may need to use a coarser grit side of the buffer, or repeat the process.
Conclusion
Mastering the use of a nail buffer block is a game-changer for achieving a perfect, smooth nail surface. By following these steps and utilizing the right techniques, you can enjoy beautifully polished nails every time. Now go forth and create stunning manicures! Share your experiences in the comments below – I’d love to hear about your smooth nail journey! Remember to pin this post for future reference.