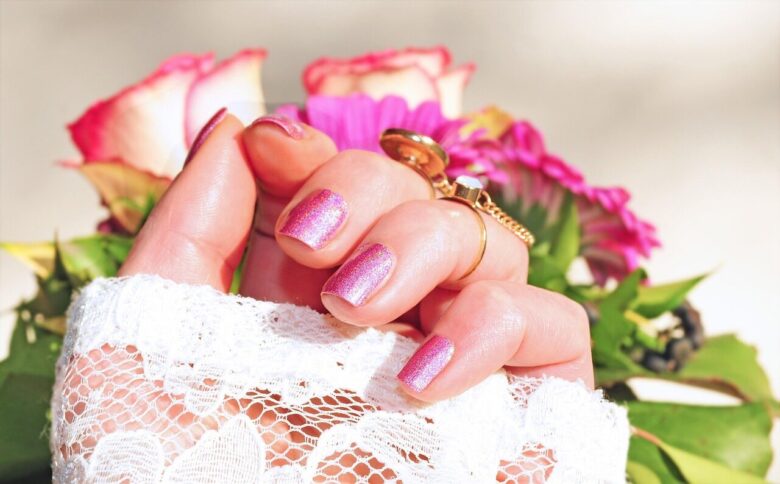
A French manicure has a reputation for being simple, but anyone who has tried to paint ten matching tips knows that “simple” is not the same as effortless.
The design leaves very little room for distraction. When there are no rhinestones, patterns, or several colors competing for attention, the eye notices the shape of the tip, the spacing around the cuticle, and whether the lines feel balanced from one nail to the next.
The reason French nails remain so adaptable is not the white polish. It is the structure: a quiet base, a defined edge, and enough empty space for the manicure to look clean.
Change the width, color, curve, or finish of that edge and you can move from traditional bridal nails to something graphic, minimal, warm, dark, or playful without losing the recognizable French shape.
This guide is less about collecting dozens of pictures and more about understanding why certain versions work. Once you know how tip width, nail shape, and base color interact, choosing a manicure becomes much easier.
Editorial approach: These ideas are presented as design guidance rather than product rankings. DolfiNails does not claim to have personally tested every polish, gel system, or salon technique mentioned in this article.
The Three-Part Formula Behind a Good French Manicure
Before choosing colors, decide how you want the manicure to feel. Most French designs can be adjusted through three simple elements.
Sheer pink looks fresh, beige feels warm, milky white softens the nail, and clear polish shows more of the natural plate.
A narrow line feels minimal. A deeper tip becomes more noticeable. A curved smile line feels softer than a straight graphic edge.
Gloss looks traditional, matte feels quieter, shimmer catches light, and a glazed layer can soften a high-contrast design.
You do not need to change all three elements at once. In fact, the versions that are easiest to wear usually change only one detail while keeping the rest restrained.
Choose Your French Manicure in 30 Seconds
Start with the result you want
Ten French Manicure Ideas That Are Easy to Personalize
The balanced classic
A sheer pink or nude base with a clean white edge remains the clearest expression of a French manicure. What makes it look current is proportion rather than novelty.
On short nails, keep the tip narrow. On medium or longer nails, the white section can be slightly deeper, but it should not occupy so much space that the base appears compressed.
The micro French
This version uses an extremely fine line at the free edge. It works especially well when the nail plate is short because the design adds definition without visually taking away length.
The line does not need to be bright white. Cream, soft pink, navy, red, or brown can be easier to wear while maintaining the minimal effect.
The milky French
A translucent milky layer softens the contrast between the base and white tip. The result feels less graphic than a traditional French manicure and is forgiving when the natural nail has slight differences in color.
Ask for enough transparency that the manicure still has depth. Several heavy opaque coats can turn the soft look into a flat white manicure.
The ombré or baby boomer French
Instead of a visible smile line, the nude base gradually blends into white. This is useful for people who like the color combination of a French manicure but do not want a sharp border.
The quality of the fade matters more than how bright the white is. An uneven gradient can appear cloudy, while a controlled blend looks deliberate and smooth.
The warm cream French
Pure bright white can look very crisp, but it is not the only choice. Cream, ivory, and soft vanilla tips create a warmer version that pairs naturally with beige, peach, and caramel base shades.
This is a useful option when stark white feels disconnected from your wardrobe, jewelry, or preferred makeup colors.
The red-tip French
A fine red edge gives the structure of a classic manicure with more personality. A clear or sheer nude base keeps the result controlled.
Choose blue-red for a sharper effect, brick red for warmth, or deep wine for a quieter evening look. Avoid combining the red tip with several other bold details if you want the shape to remain the focus.
The black micro French
A thin black tip can look graphic without making the manicure heavy. It works best when the line is precise and the base remains clean.
On very short nails, keep the black line extremely fine. A thick dark band can visually shorten the nail plate more than a white or pastel tip would.
The double-line French
Paint the main tip, then add a second fine line immediately beneath it. The small strip of visible base between the lines keeps the design light.
For a calmer version, use two shades from the same color family. For more contrast, pair white with gold, navy with silver, or burgundy with pale pink.
The side French
Instead of following the entire free edge, the tip color sweeps diagonally along one side of the nail. It keeps the open space of a French manicure while introducing movement.
This shape is more forgiving than a perfectly centered smile line because small differences can look intentional. Keep the angle similar across all ten nails so the set still feels connected.
The pearl-finish French
Begin with a classic, milky, or ombré French manicure and apply a very fine pearly top layer. The effect should catch the light rather than hide the design beneath a thick metallic finish.
This approach works well when you want a special-event manicure that still feels recognizable in photographs years later.
Match the Tip to the Nail Shape
The same white line can produce a completely different result depending on the outline beneath it. Rather than forcing every nail into a shape that is difficult to maintain, work with the length and curve you already have.
| Nail shape | French tip that usually feels balanced | Practical consideration |
|---|---|---|
| Short round | Very thin curved or micro tip | Comfortable for active hands and less likely to catch |
| Squoval | Softly squared line with rounded corners | A practical middle ground between square and round |
| Square | Straight or gently curved tip | Corners may need regular smoothing if they catch on fabric |
| Oval | Fine curved smile line | Creates a natural transition from the sidewalls |
| Almond | Curved or V-shaped tip | Requires enough length to form the tapered outline |
| Coffin | Straight tip or soft ombré | Often depends on extensions and requires more maintenance |
For more ideas designed around practical lengths, visit our guide to short nail designs.
How to Choose a Base Color That Does Not Look Artificial
There is no universal nude shade that suits every person. A color labeled “natural pink” may look rosy on one hand, gray on another, and almost opaque on someone else.
NATURAL LIGHT
Try one stripe before committing to the full manicure.
Apply the base shade to one nail and look at it beside a window after it dries. The best option is not necessarily an exact match for your skin. It should simply look intentional and avoid making the nail appear unusually gray, orange, or washed out.
As a starting point:
- Sheer pink: gives the nail a fresh, slightly rosy appearance.
- Peach nude: adds warmth and can soften a bright white tip.
- Beige nude: creates a quieter, less pink finish.
- Milky white: reduces visible contrast and softens natural color differences.
- Clear base: keeps the manicure minimal but shows every mark on the natural nail.
Our guide to choosing nail colors for different skin tones and occasions offers more ways to compare shades without relying on rigid rules.
How to Paint a French Manicure With Regular Polish
A salon-perfect line may take practice, but regular polish gives you time to correct mistakes before everything fully dries.
Shape and clean the nail
Smooth the free edge, remove visible dust, and make sure the nail plate is dry. Avoid aggressive surface buffing simply to make the polish adhere.
Apply a thin base layer
Use one controlled coat of sheer pink, beige, nude, clear, or milky polish. Add a second thin coat only when the first does not provide the finish you want.
Choose a painting method
You can move the polish brush across the tip, rotate the finger beneath a steady brush, use a detail brush, or apply a guide sticker after the base is fully dry.
Paint less than you think you need
Begin with a narrow line. It is easier to make a tip slightly deeper than to remove a thick band from ten nails.
Correct the outline
Use a small angled brush lightly dampened with remover to refine uneven areas. Wipe the brush between nails so old color is not transferred back onto the manicure.
Seal the free edge
Apply top coat over the full nail and lightly sweep it across the edge. Give the layers enough time to set before using hot water or applying pressure.
The easier hand: Paint your dominant hand first. You will be using your less coordinated hand while you are still patient and before the polish on the other hand can be smudged.
For additional beginner techniques, see our collection of easy nail art ideas.
What to Say at the Salon
“French manicure” can mean several different things to different technicians. A short description prevents surprises more effectively than asking for something “natural” or “not too thick.”
A clear salon request
Change the details in that sentence according to your preference:
- Replace “white” with the color you want.
- Specify micro, medium, or deep tip width.
- Say whether you prefer a straight, curved, diagonal, or V-shaped line.
- Mention glossy, matte, milky, pearly, or ombré finish.
- Bring a photograph, but explain which part of it you actually like.
Small Mistakes That Change the Whole Result
A thick band can dominate short nails. Make the line narrower instead of trying to create more length with an opaque base.
Several coats of nude polish may hide the natural depth that gives French nails their clean appearance. Try a sheerer formula or fewer coats.
Minor differences are normal, but the highest point of the curve should sit in a similar position across the set.
Use a thinner coat, try cream instead of bright white, or add a sheer milky layer over the finished tip.
Choose one feature: colored tips, chrome, glitter, rhinestones, or a second line. The design becomes less clear when every idea appears at once.
Shorten the length or soften sharp corners. A beautiful shape that constantly catches and bends will quickly become frustrating.
How to Make the Manicure Last More Gracefully
Wear at the tip is normal because the free edge meets keyboards, clothing, water, packaging, and household surfaces throughout the day.
- Apply polish in thin layers and allow adequate drying time.
- Use top coat across the nail and lightly along the free edge.
- Wear gloves for dishes, cleaning, and prolonged wet work.
- Use actual tools to open containers and lift labels.
- File a snag before it catches and tears farther.
- Apply moisturizer to the nails and surrounding skin.
- Do not peel regular polish, gel, press-ons, or enhancement products away.
- Remove the manicure when lifting or wear becomes difficult to maintain cleanly.
For more preparation and removal advice, read How to Choose the Best Nail Polish for Long-Lasting Results.
When to Postpone a French Manicure
Do not use polish to hide a nail that needs attention
Pause cosmetic application if a nail or the surrounding skin is painful, swollen, bleeding, unusually warm, producing fluid, significantly discolored, or separating from the skin beneath it.
Cuticles help protect the nail root, so avoid cutting deeply around the nail simply to create a cleaner polish line. Read nail-product labels, follow the manufacturer’s instructions, and use products in an appropriately ventilated area.
Stop using a product if it causes burning, itching, swelling, persistent redness, or another unexpected reaction. Unusual or lasting changes should be assessed by a qualified healthcare professional.
Frequently Asked Questions
What French manicure works best on very short nails?
A micro French line usually works well because it defines the free edge without covering much of the nail plate. Use a sheer base and keep the line narrow across all ten nails.
How can I make both hands look more even?
Paint your dominant hand first, rest both hands on a stable surface, and use a small cleanup brush to refine the lines. Aim for similar proportions rather than expecting every natural nail to have an identical curve.
Is gel necessary for a French manicure?
No. A French manicure can be created with traditional polish, gel, press-ons, or other systems. Regular polish is useful when you want easier color changes and removal without curing equipment.
What is the difference between a milky French and an ombré French?
A milky French usually retains a visible tip but softens it beneath a translucent milky layer. An ombré French blends the base and tip together so there is no clear dividing line.
Can colored French tips still look understated?
Yes. Keep the colored line narrow, pair it with a sheer neutral base, and avoid adding several competing decorations. Burgundy, navy, brown, muted red, and black can all create restrained versions.
Final Takeaway
A French manicure does not stay relevant because everyone wears the same white tip. It lasts because the basic layout can be adjusted without losing its clarity.
Start with the shape and length that work for your hands. Then choose one change: a finer line, a warmer white, a milky base, a dark edge, a soft gradient, or a small second detail.
The most successful version is not necessarily the most complicated. It is the one whose proportions look intentional, whose products feel comfortable, and whose length fits the way you use your hands every day.
Editorial note: This article provides general beauty and nail-design guidance. It does not replace medical evaluation or individualized advice from a qualified nail professional. DolfiNails does not currently use affiliate links in this guide.
Sources and Further Reading
- American Academy of Dermatology — Dermatologists’ Tips for Healthy Nails
- American Academy of Dermatology — How to Trim Your Nails
- U.S. Food and Drug Administration — Nail Care Products
Last editorial review: July 17, 2026
The DolfiNails Editorial Team creates practical and carefully researched content about nail care, manicure techniques, nail art, tools, and beauty products. Each article is reviewed for clarity, usefulness, and reader safety to help readers make better-informed decisions about their nail care routines.