Learning how to repair damaged nails after gel or acrylic manicures starts with one simple truth: most nail damage improves slowly because the weakened part usually has to grow out. Thin, peeling, sore, bendy, or rough nails often happen after aggressive filing, picking off product, long acetone exposure, or repeated enhancements without enough recovery time.
The goal is not to “fix” the entire nail overnight. A safer approach is to protect the nail plate, reduce new trauma, restore moisture, keep the nails short, and avoid products or habits that make splitting worse. With consistent care, many nails gradually look smoother and feel stronger as new nail grows from the base.
Gel and acrylic manicures can look beautiful, but the removal process is often where the most damage happens. Peeling, prying, drilling too deeply, or scraping hard can remove layers from the natural nail. Once those layers are gone, a polish or oil can improve comfort and appearance, but it cannot instantly rebuild the original thickness.
This guide explains what to do after removal, which products are worth considering, what to avoid, and when nail changes may need professional advice. It focuses on practical steps that are easy to follow at home without making the problem worse.
If your nails are painful, lifting, green, yellow, swollen, bleeding, or changing shape for no clear reason, treat that as more than cosmetic damage. In those cases, a dermatologist, doctor, or qualified nail professional can help you avoid infection, allergic reactions, or deeper nail problems.
Important safety note: this article is for general nail care education and does not replace medical evaluation. If you have pain, swelling, pus, severe lifting, unusual discoloration, or a suspected allergic reaction, avoid applying more nail products and speak with a healthcare professional.
How to Repair Damaged Nails After Gel or Acrylic Manicures Safely
The safest way to repair damaged nails after gel or acrylic manicures is to stop adding stress while the nail grows out. Natural nails are made of layers of keratin. When those layers are thinned by filing, acetone, scraping, or peeling, the nail may bend, split, or feel sensitive. The first goal is protection, not aggressive treatment.
In practice, many people make the damage worse because they try to smooth the nail too quickly. Heavy buffing can make the surface look better for a day, but it can also remove more nail plate. A better option is to gently file sharp edges, moisturize often, and use a protective base coat only if the nail is not painful or inflamed.
Recovery time depends on how much damage occurred and how fast your nails grow. Fingernails often need several months to fully replace the damaged section. That does not mean you will see no improvement until then. Comfort, flexibility, and reduced peeling may improve earlier if you avoid picking, keep the nails short, and protect them from water and cleaning products.
| Type of damage | Possible cause | Safer first step |
|---|---|---|
| Thin, bendy nails | Over-filing, drilling, or repeated product removal | Keep nails short and avoid more enhancements until stronger growth appears |
| Peeling at the tips | Dryness, acetone exposure, or layered nail damage | File gently in one direction and apply hand cream or cuticle oil daily |
| White rough patches | Surface trauma from scraping or lifting product | Avoid buffing aggressively and use a gentle protective base coat if tolerated |
| Soreness or sensitivity | Nail plate thinning or trauma near the nail bed | Stop polish, glue, and removers; seek advice if pain continues |
| Green, yellow, or dark discoloration | Possible infection, staining, trauma, or product reaction | Do not cover it with polish; get professional evaluation |
What to Do Immediately After Removing Gel or Acrylic Nails
The first few days after removal are important because the nails are often at their weakest. Avoid the temptation to cover the problem with a new set right away. If the surface is rough or embarrassing, choose protection over decoration. Short nails are less likely to bend, catch on fabric, or split deeper into the nail plate.
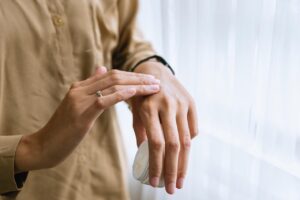
Start by washing your hands gently, drying them well, and applying a thick hand cream. Then use cuticle oil or a simple moisturizer around the nail folds and under the free edge if the skin is not broken. Moisture does not “grow” the nail faster, but it can reduce brittleness and make the nail more flexible.
If a nail has a sharp split, file the edge smooth instead of pulling it. If the nail is lifting from the nail bed, avoid gluing it down yourself, especially if there is pain, odor, or color change. Covering a problem nail can trap moisture and make infection more likely.
- Trim nails short enough that they do not bend when you press objects.
- Use a fine-grit nail file and smooth only rough edges.
- Apply hand cream after washing your hands.
- Use cuticle oil once or twice daily if your skin tolerates it.
- Wear gloves for cleaning, dishwashing, or repeated water exposure.
- Avoid picking, peeling, biting, or using nails as tools.
Step-by-Step Recovery Routine for Weak Nails
A simple routine works better than using many products at once. Damaged nails are already stressed, so strong chemicals, frequent polish changes, and constant buffing can slow the recovery process. The routine below focuses on reducing trauma and supporting normal nail growth.
-
Remove any remaining product safely.
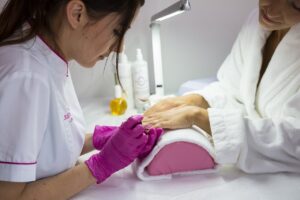
If gel, acrylic, glue, or dip product is still attached, do not rip it off. If it does not come away with gentle professional removal, see a qualified nail technician. Pulling product off can remove layers from the natural nail and create deeper peeling.
-
Shorten the nails carefully.
Trim them to a practical length and shape the edge with a fine file. Rounded or softly square edges usually catch less than sharp corners. Avoid cutting into the sides because this can irritate the skin and increase the chance of painful edges.
-
Smooth only what is necessary.
Lightly smooth a snag if it catches on clothing, but do not buff the entire nail plate to make it shiny. Over-buffing can thin the nail even more. If the surface looks uneven, a ridge-filling base coat is often safer than repeated abrasion.
-
Moisturize the nail and surrounding skin.
Apply hand cream after washing and use cuticle oil if the area is dry. Focus on consistency rather than expensive products. The aim is to reduce dryness and brittleness while the damaged section grows forward.
-
Protect your hands during chores.
Wear gloves when using cleaning products or keeping your hands in water for a long time. Repeated wet-dry cycles can make weak nails split more easily. Dry your hands fully after washing, especially around the nail folds.
-
Use a gentle base coat only if needed.
If your nails are not painful, red, swollen, or lifting, a strengthening or ridge-filling base coat may reduce snagging. Avoid formaldehyde-based hardeners if they irritate your skin or make the nail feel more brittle.
-
Take a break from extensions.
Give the nail time to grow without gel, acrylic, dip, or glue. Regular polish may be acceptable for some people, but remove it gently and avoid frequent color changes. If the nail burns or stings under polish, remove it and pause.
-
Track warning signs.
Watch for pain, swelling, warmth, pus, nail lifting, dark streaks, or green-yellow discoloration. These signs may need professional care. Do not hide them under new product, because covering the nail can delay proper treatment.
Best Products and Ingredients to Consider
You do not need a large routine to help damaged nails recover. A gentle hand cream, cuticle oil, fine nail file, protective gloves, and possibly a ridge-filling or strengthening base coat are enough for many people. The product should match the problem: dryness needs moisture, splitting needs protection, and pain needs rest.
Be careful with strong nail hardeners. Some hardeners can make the nail feel firmer temporarily, but frequent use may also make nails more brittle or irritating for some people. If a product causes burning, itching, redness, swelling, or peeling around the nail, stop using it and consider medical advice.
Also avoid using many treatments at once. If you apply a hardener, oil, serum, glue, base coat, and remover repeatedly, you may not know which product is helping or irritating your nails. A simple routine makes it easier to notice real improvement.
| Product or tool | When it helps | Caution |
|---|---|---|
| Cuticle oil | Dry skin, rough cuticles, brittle-looking nails | Do not apply over infected or broken skin without medical advice |
| Thick hand cream | Frequent handwashing, dryness, peeling around fingertips | Choose fragrance-free if your skin is sensitive |
| Fine-grit nail file | Snags, sharp edges, small splits at the tip | Do not saw aggressively back and forth on weak nails |
| Ridge-filling base coat | Uneven surface, mild roughness, cosmetic smoothing | Do not use to cover pain, infection, or severe lifting |
| Nail strengthener | Flexible nails that need temporary support | Stop if nails become more brittle or skin becomes irritated |
| Protective gloves | Cleaning, dishwashing, gardening, chemical exposure | Keep gloves dry inside to avoid trapping moisture |
Daily Habits That Help Nails Grow Back Stronger
Healthy nail recovery is mostly about repetition. Small daily choices protect the new nail as it grows from the matrix, which is the growth area under the skin near the base of the nail. If the new nail keeps facing trauma, the recovery process becomes frustrating because the fresh growth gets damaged too.
One common mistake is using nails as tools. Opening cans, scraping labels, peeling stickers, or typing with the nail tip can keep weak nails splitting. Try using the pads of your fingers instead. It may feel minor, but this habit change often makes a noticeable difference for fragile nails.
Food also matters, but avoid treating supplements as a magic fix. A balanced diet with enough protein, iron, zinc, and general nutrients supports normal nail growth. If you suspect a deficiency, speak with a healthcare professional before taking high-dose supplements, especially if you already use medication or have health conditions.
- Keep nails short during the repair phase.
- Moisturize after handwashing and before bed.
- Use gloves for water, cleaning products, and harsh chemicals.
- Avoid acetone unless it is truly needed for product removal.
- Do not push cuticles back aggressively.
- Do not bite, peel, or pick at rough nail layers.
- Choose regular polish breaks instead of back-to-back enhancements.
- Watch for pain, swelling, lifting, or unusual color changes.
Common Mistakes That Make Nail Damage Worse
The biggest mistake is covering damaged nails too soon with another gel or acrylic set. This may hide the problem, but it does not repair the nail underneath. If the nail plate is already thin, more filing and removal can create a cycle where the nails feel too weak whenever the product comes off.
Another mistake is over-buffing. A smooth nail surface looks healthier, but buffing works by removing surface material. When the nail is already thin, removing more layers can increase sensitivity and bending. Use buffing only for tiny snags, and choose a ridge-filling base coat if the main issue is appearance.
Some people also apply nail glue to every split. Glue may be useful for a minor cosmetic break in some situations, but it is not a solution for sore, lifted, discolored, or infected nails. If the split is deep or painful, professional guidance is safer than sealing the area and hoping it grows out.
| Mistake | Why it is risky | Better option |
|---|---|---|
| Peeling off gel or acrylic | Can remove layers of the natural nail | Use proper removal or visit a qualified technician |
| Getting a new set immediately | Adds more filing, chemicals, and removal stress | Take a recovery break until nails feel stronger |
| Buffing every few days | Can thin the nail plate further | File only rough edges and use a gentle base coat |
| Ignoring pain or swelling | May delay treatment for infection or allergy | Stop nail products and seek professional advice |
| Using harsh hardeners too often | May cause brittleness or irritation in some people | Use sparingly and stop if irritation appears |
When to Avoid DIY Repair and Seek Professional Help
Not every damaged nail is a simple beauty issue. Some changes can point to infection, allergic reaction, injury, or an underlying health concern. If the skin around the nail becomes red, warm, swollen, painful, or filled with pus, do not apply polish or glue over it. That area needs proper evaluation.
Discoloration also deserves attention. A greenish shade can sometimes happen when moisture is trapped between the natural nail and artificial product. Yellow, brown, black, or white changes may have several causes, including staining, trauma, fungus, or other nail conditions. A professional can help identify the difference.
Seek help quickly if the nail is lifting significantly, if pain is getting worse, if the nail shape changes without a clear reason, or if a dark streak appears and does not grow out with the nail. A dermatologist is the best choice for medical nail concerns, while a careful nail technician can help with safe cosmetic removal and prevention.
- See a professional if the nail is painful, swollen, hot, or leaking fluid.
- Do not cover green, yellow, brown, black, or unusual discoloration with polish.
- Ask for help if the nail is lifting from the nail bed.
- Stop using a product that causes itching, burning, redness, or rash.
- Get medical advice if nail changes keep returning after every manicure.
- Consider a dermatologist if several nails change shape or thickness at once.
How to Prevent Future Damage From Gel or Acrylic Manicures
Once your nails recover, you may still choose to get gel or acrylic manicures. Prevention is about reducing risk, not assuming every manicure will cause damage. The salon, the technique, the removal process, and how often you wear enhancements all matter.
Choose a salon that does not rush removal, over-file the natural nail, or force product off. A careful technician should protect the natural nail and explain when your nails need a break. If every removal leaves your nails sore and paper-thin, that is a sign to change the process or pause enhancements.
For gel manicures, consider protecting the skin on your hands from curing lamps by following dermatologist-style precautions such as applying broad-spectrum sunscreen to exposed skin before the service or using fingerless UV-protective gloves. This protects the skin, not the nail plate itself, but it is a sensible safety habit for repeated gel services.
| Before the manicure | During the service | During removal |
|---|---|---|
| Check that nails are not sore, lifting, or infected | Avoid aggressive cuticle cutting | Never peel or pry product off |
| Choose a reasonable length for your lifestyle | Ask for minimal filing on the natural nail | Allow enough time for safe soaking or professional removal |
| Use hand cream regularly before your appointment | Tell the technician if you feel heat, pain, or burning | Moisturize after removal and take breaks when needed |
Conclusion
Repair damaged nails after gel or acrylic manicures by keeping them short, moisturized, protected, and free from repeated enhancement stress while the damaged section grows out. The most important rule is to avoid creating new damage through peeling, harsh scraping, over-buffing, or covering warning signs with more product.
A simple recovery routine is usually better than a complicated one: gentle filing, hand cream, cuticle oil, gloves for chores, and a careful break from gel, acrylic, dip, or glue. Protective products can help appearance and comfort, but they should not cause burning, itching, or extra brittleness.
If your nails are painful, lifting, swollen, discolored, or changing shape without a clear reason, the safest next step is professional advice. A dermatologist can evaluate medical nail problems, while a qualified nail technician can help with safer removal and future manicure choices.
FAQ
1. Can damaged nails from gel or acrylic manicures really recover?
Yes, many damaged nails can recover, but the process depends on how much of the nail plate was thinned, peeled, or injured. Products can improve flexibility, reduce dryness, and protect the surface, but the most damaged part often needs to grow out. This is why patience matters. Keeping nails short, moisturizing daily, avoiding more enhancements, and protecting hands from water and cleaning products can help prevent new splitting while healthier nail grows from the base.
2. How long does it take for nails to heal after acrylics?
It often takes several months for nails to look and feel normal again because fingernails grow slowly. You may notice comfort and reduced peeling earlier, especially if you stop picking and keep the nails short. However, thin or rough areas usually need to move forward and be trimmed away over time. If the nail is painful, lifting, or discolored, do not wait months without guidance. Those signs may need a dermatologist or healthcare professional.
3. Should I cut my nails short after gel damage?
Yes, short nails are usually safer during recovery. Long, weak nails bend more easily, catch on fabric, and split deeper. Trimming them short reduces pressure on the damaged tip and makes daily tasks easier. Use a fine nail file to smooth rough edges, and avoid cutting into the sides of the nail. A softly rounded or squoval shape is often practical because it has fewer sharp corners that can snag or break.
4. Is cuticle oil enough to repair damaged nails?
Cuticle oil can help dryness and flexibility, but it is not a complete repair by itself. It supports the nail and surrounding skin by reducing brittleness and improving comfort. However, it cannot instantly rebuild nail layers that were removed by filing, peeling, or scraping. For best results, combine cuticle oil with short nails, gentle filing, hand cream, gloves during chores, and a break from harsh nail services until stronger growth appears.
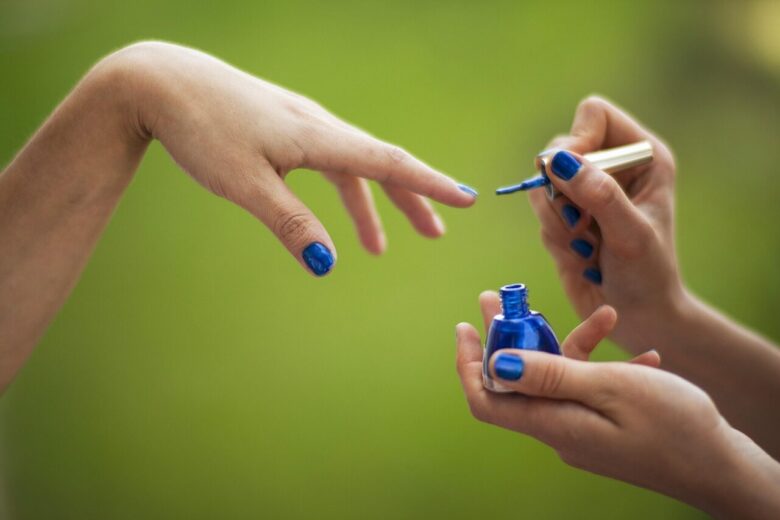
5. Can I put regular nail polish on damaged nails?
Regular nail polish may be okay if your nails are not painful, swollen, lifting, or discolored. A gentle base coat can help protect the surface and make roughness less noticeable. The main concern is removal. Frequent remover use, especially acetone, can dry already weak nails. If polish burns, stings, chips quickly, or makes peeling worse, pause and focus on moisturizing and protection instead of covering the nail.
6. Are nail strengtheners safe after gel or acrylic damage?
Some nail strengtheners can be useful, but they are not right for everyone. A strengthening base coat may reduce bending and protect the surface, but strong hardeners can make some nails feel more brittle or irritate the surrounding skin. Use one product at a time and stop if you notice burning, redness, itching, or increased peeling. If your nails are very thin or painful, ask a dermatologist before using stronger treatments.
7. Should I buff damaged nails to make them smooth?
Buffing should be very limited. It can make rough nails look smoother, but it also removes surface material from the nail plate. If your nails are already thin after gel or acrylic removal, frequent buffing can make them weaker. Only smooth small snags that catch on clothing. For cosmetic unevenness, a ridge-filling base coat is often safer than repeatedly buffing the whole nail surface.
8. Why do my nails hurt after removing acrylics?
Pain after acrylic removal may happen when the natural nail has been over-filed, scraped, pulled, or thinned. The nail bed underneath can feel sensitive when the protective nail plate is reduced. Mild tenderness may improve with rest and protection, but strong pain, swelling, warmth, pus, or nail lifting is not something to ignore. Avoid applying more acrylic, gel, glue, or polish until the cause is clear.
9. Can I get another gel manicure while my nails are recovering?
It is usually better to wait if your nails are thin, peeling, sore, or splitting. Another gel manicure may hide the damage, but it adds more preparation and another removal process later. If you really want polish, consider regular polish with gentle removal only if the nails are not painful or inflamed. If every gel manicure leaves your nails weak, change the technician, removal method, or frequency of appointments.
10. What does green discoloration after acrylic nails mean?
Green discoloration can sometimes appear when moisture becomes trapped between the natural nail and an artificial product, but color changes can have different causes. Do not cover the nail with polish, glue, acrylic, or gel to hide it. Keep the area clean and dry, and seek professional advice, especially if there is odor, lifting, pain, swelling, or the color spreads. Covering the nail may delay proper care.
11. Do vitamins help damaged nails grow faster?
Vitamins only help if your body actually needs them. Nails require good general nutrition, including enough protein and key nutrients, but supplements are not a guaranteed fix for manicure damage. Taking high-dose supplements without guidance can be unnecessary or unsafe for some people. If your nails are weak along with tiredness, hair changes, unusual skin symptoms, or several nail changes at once, a healthcare professional can check whether a deficiency or health issue is involved.
12. When should I see a dermatologist for damaged nails?
See a dermatologist if your nails are painful, lifting, swollen, bleeding, producing pus, turning green or dark, or changing shape without a clear reason. You should also get help if the skin around the nail becomes red, warm, itchy, or cracked after using nail products. These signs may point to infection, allergy, trauma, or another nail condition. A dermatologist can diagnose the cause instead of simply covering the symptom.
Editorial note: this article is for educational nail care guidance and does not replace evaluation from a dermatologist, doctor, or qualified nail professional when there is pain, infection risk, allergic reaction, severe nail lifting, or unexplained discoloration.
Official References

Nora Ashford is a licensed nail technician and beauty educator with over 12 years of hands-on experience in professional nail care, product formulation, and salon hygiene. She began her career working in high-end nail studios across London and New York before transitioning into content creation to help people make informed, safe choices about their nail health and beauty routines.
Her work focuses on translating complex nail science into practical, easy-to-follow advice. She regularly reviews nail products, tests application techniques, and shares evidence-based tips on everything from cuticle care to gel safety.
Nora believes that beautiful nails should never come at the cost of nail health, and she is committed to helping readers achieve salon-quality results responsibly.