Simple nail designs are a practical way to make your nails look clean, polished, and creative without needing salon equipment or advanced skills. You do not need dotting tools, stamping plates, gel lamps, or professional brushes to create a neat manicure at home.
Many beginner-friendly nail ideas can be done with items you probably already have, such as toothpicks, cotton swabs, tape, a makeup sponge, or the polish brush that comes inside the bottle. The key is choosing designs that look intentional but are easy to control.
This guide focuses on simple techniques that work well for short, medium, and long nails. You will learn how to prepare your nails, choose easy designs, avoid common mistakes, and keep your manicure looking fresh for longer.
Instead of trying complicated salon-style art right away, it is better to start with clean shapes, soft color combinations, small accents, and designs that do not require perfect symmetry. These details can make a home manicure look more polished with much less effort.
With a steady surface, a little patience, and the right order of steps, even a beginner can create simple nail designs at home without special tools.
Important note: avoid using sharp objects near your skin, do not cut your cuticles aggressively, and stop using any nail product that causes burning, swelling, irritation, or discomfort. If you have nail damage, infection signs, or persistent pain, ask a qualified professional for guidance.
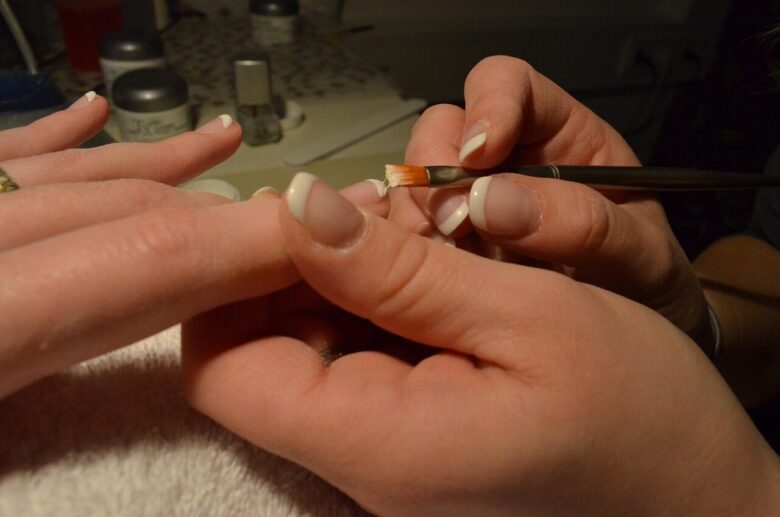
How to Prepare Your Nails Before Any Simple Nail Design
Good preparation makes a bigger difference than many people expect. Even the easiest nail design can look messy if the nail surface is oily, the edges are uneven, or old polish is left behind.
Start by removing any previous polish completely. Then wash your hands, dry them well, and gently shape the nails with a file. A rounded or soft square shape is usually easier for beginners because it looks tidy even when the nails are not all exactly the same length.
If your nails have natural shine or oil on the surface, polish may peel faster. In many cases, simply wiping the nail with a little nail polish remover before applying the base coat helps the color grip better.
Do not rush this stage. A common mistake is spending time on the design while skipping the base. This can make the polish look uneven and may also stain the natural nail, especially with darker colors.
- Remove old polish completely before starting.
- File nails into a simple and even shape.
- Wash and dry your hands well.
- Push back cuticles gently instead of cutting them deeply.
- Apply a thin base coat before color.
- Keep cotton swabs and remover nearby for small cleanup.
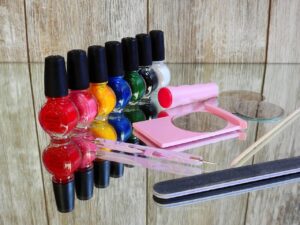
Best Household Items You Can Use Instead of Nail Art Tools
You do not need professional nail art tools to create attractive designs. Many everyday items can help you make dots, lines, borders, gradients, and small accents with enough control for beginner designs.
A toothpick can replace a fine detail tool for tiny dots or small hearts. A cotton swab can help clean polish around the nail edges. Tape can create clean geometric lines, and a makeup sponge can help create a soft gradient.
The important point is to use these items carefully. For example, tape should only be placed on polish that is fully dry. If the base color is still soft, the tape may lift it and ruin the design.
| Household item | Best use | Important care |
|---|---|---|
| Toothpick | Tiny dots, small hearts, simple flowers | Use light pressure to avoid scratching wet polish. |
| Cotton swab | Cleaning polish around the nails | Dip lightly in remover so it does not flood the nail. |
| Tape | Diagonal tips, color blocks, straight lines | Wait until the base color is completely dry. |
| Makeup sponge | Soft ombré or gradient effect | Use thin layers to avoid a thick, uneven finish. |
| Bobby pin | Medium-sized dots | Clean the rounded end before using it. |
| Plastic wrap | Marble-like texture | Tap gently instead of pressing hard. |
Simple Nail Designs You Can Do at Home Without Special Tools
The best simple nail designs are the ones that look neat even if they are not perfectly identical on every nail. This is why dots, accent nails, soft gradients, diagonal tips, and minimal lines are great choices for beginners.
One easy option is the accent nail design. Paint most nails one color and choose one nail on each hand for a small detail, such as dots, glitter, or a different shade. This gives the manicure personality without requiring complex artwork on every finger.
Another beginner-friendly option is the dotted manicure. You can use a toothpick or bobby pin to add dots near the cuticle, across the tip, or in a simple flower shape. The dots do not need to be perfect; they only need to be placed with intention.
For a more modern look, try diagonal tips with tape. Apply your base color, let it dry fully, place tape diagonally across the nail, paint the exposed section, and remove the tape carefully while the second color is still slightly wet.
| Design idea | Difficulty level | Why it works well at home |
|---|---|---|
| Accent nail | Very easy | Only one or two nails need extra detail. |
| Dot pattern | Easy | Dots can be made with a toothpick or bobby pin. |
| Diagonal tips | Easy to medium | Tape helps create a clean edge. |
| Soft ombré | Medium | A makeup sponge can blend two colors softly. |
| Minimal line | Easy | A toothpick can create a thin, simple detail. |
| Glitter tip | Very easy | Glitter hides small imperfections near the edge. |
Step-by-Step Guide for a Beginner-Friendly Dot Design
A dot design is one of the safest choices for beginners because it does not require perfect brush control. It also works with almost any nail length and color combination.
For a clean look, choose one base color and one dot color. A neutral base with white, gold, black, or pastel dots usually looks simple and stylish. If you want a playful look, you can use several colors, but keep the pattern simple.
-
Apply a base coat.
Use a thin layer to protect the natural nail and help the polish last longer. Avoid applying too much product because thick layers take longer to dry.
-
Paint your base color.
Apply one or two thin coats of your chosen color. Let each coat dry enough before adding the next layer so the surface stays smooth.
-
Place a small amount of polish on a flat surface.
You can use a piece of foil, plastic, or an old plate. Do not dip the toothpick directly into the bottle because it can make the polish thick or messy.
-
Create dots with a toothpick or bobby pin.
Dip the tip lightly into the polish and touch it gently onto the nail. For a cleaner pattern, start with fewer dots and add more only if needed.
-
Let the design dry before top coat.
Wait until the dots are no longer wet. If you apply top coat too soon, the dots may drag or smear across the nail.
-
Seal with a top coat.
Use a thin layer to protect the design and add shine. Move the brush gently so you do not disturb the details underneath.
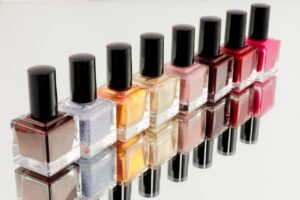
Easy Color Combinations That Look Polished
Choosing the right colors can make a very simple design look more professional. You do not need many shades; two or three colors are enough for most beginner nail ideas.
Neutral colors are usually easier to work with because small mistakes are less visible. Beige, soft pink, milky white, gray, and nude shades are good starting points. For contrast, add black dots, white lines, silver glitter, or a deeper version of the same color.
If you prefer brighter nails, choose one strong color and balance it with a softer shade. For example, coral with nude, navy with pale blue, or red with sheer pink can look intentional without feeling too busy.
| Color combination | Best design style | Beginner tip |
|---|---|---|
| Nude and white | Dots, tips, minimal lines | Great for a clean everyday look. |
| Soft pink and glitter | Accent nail or glitter tip | Use glitter on one or two nails only. |
| Black and beige | Minimal dots or thin lines | Use black carefully because mistakes show more. |
| Blue and pale blue | Ombré or color block | Similar shades are easier to blend. |
| Red and sheer pink | Accent heart or French-style tip | Keep the red detail small for a softer look. |
Common Mistakes That Make Home Nail Designs Look Messy
Most home manicure problems come from rushing. Nail polish needs time to settle between layers, especially when you are adding details on top of a base color.
Another common mistake is using too much polish. Thick layers may look smooth at first, but they can wrinkle, dent, or peel faster. Thin layers are easier to control and usually dry with a cleaner finish.
It is also important to clean the edges before the polish fully hardens. A small cotton swab with remover can fix polish on the skin, but using too much remover may touch the nail and damage the design.
| Common mistake | What can happen | Better approach |
|---|---|---|
| Applying thick coats | Polish may dent, bubble, or peel quickly. | Use two thin coats instead of one heavy coat. |
| Adding tape too soon | The base color may lift off. | Wait until the polish is completely dry. |
| Using too many colors | The design can look crowded. | Start with two colors and one accent. |
| Skipping top coat | The design may chip faster. | Seal the design after it dries. |
| Cleaning with too much remover | The remover can flood the nail edge. | Use a lightly damp cotton swab. |
- Do not paint over wet layers unless the design requires blending.
- Avoid using more than three colors in a beginner design.
- Keep your hands resting on a flat surface while painting.
- Use thin coats instead of thick polish layers.
- Let details dry before adding top coat.
- Clean the skin around the nail before the polish fully sets.
How to Make Simple Nail Designs Last Longer
A simple design can last longer when the nail surface is clean, the layers are thin, and the free edge of the nail is sealed. Sealing the edge means brushing a small amount of polish across the tip of the nail to reduce early chipping.
Top coat is also important. It protects the design, adds shine, and helps smooth small texture differences from dots, glitter, or sponge effects. If your manicure starts to lose shine after a few days, a fresh thin layer of top coat may help refresh it.
Daily habits matter too. Frequent water exposure, cleaning products, and using your nails as tools can shorten the life of any manicure. Wearing gloves for cleaning and avoiding picking at labels or packages can help preserve the polish.
When to Keep the Design Minimal
Minimal designs are often the best choice when you want your nails to look clean but do not have much time. A single dot near the cuticle, a glitter accent nail, or a soft diagonal tip can look elegant without requiring advanced technique.
This is especially useful for short nails. Very detailed designs can be harder to fit on a small nail surface, while minimal details usually look balanced and neat. In practice, short nails often look better with smaller accents rather than crowded patterns.
Minimal designs are also easier to fix. If one dot is uneven or one line is slightly imperfect, it is less noticeable than a full detailed pattern across all ten nails.
When to Ask a Nail Professional for Help
Simple nail designs at home are usually safe when you are only using regular polish and gentle tools. However, there are situations where professional help is the better choice.
If your nails are lifting, painful, discolored in an unusual way, very weak, or surrounded by irritated skin, it is better not to cover the issue with polish. Nail polish can hide signs that need attention.
You should also consider a professional if you want acrylics, hard gel, extensions, or removal of salon products. These services require proper technique, and incorrect removal can weaken or damage the natural nail.
- Ask for help if your nails hurt or feel sensitive.
- Do not apply polish over irritated or injured skin.
- Avoid forcing off gel, acrylic, or glued nails at home.
- Check product labels if you have allergies or skin sensitivity.
- Choose a professional for extensions or advanced nail systems.
Conclusão
Simple nail designs can look beautiful at home when you focus on clean preparation, easy patterns, and thin layers of polish. Dots, accent nails, diagonal tips, glitter details, and soft gradients are all beginner-friendly options that do not require special tools.
The safest way to start is to choose one simple idea, use only a few colors, and give each layer enough time to dry. This makes the process easier and helps the final result look more polished, even if you are still learning.
If you want simple nail designs that last longer, protect your nails with base coat, seal the design with top coat, and avoid covering signs of nail irritation or damage. For pain, infection signs, extensions, or difficult removals, it is better to look for qualified professional help.
FAQ
1. What is the easiest nail design for beginners?
The easiest nail design for beginners is usually an accent nail or a dot design. With an accent nail, you paint most nails one color and add a small detail to only one nail on each hand. This keeps the manicure simple while still making it look intentional. Dot designs are also easy because you can make them with a toothpick, bobby pin, or the end of a cotton swab. Start with a neutral base and a contrasting dot color. Avoid complicated patterns at first, because small, clean details often look better than designs that are too crowded.
2. Can I do nail art without buying tools?
Yes, you can do nail art without buying special tools. Many simple designs can be created with household items such as tape, toothpicks, cotton swabs, makeup sponges, bobby pins, and plastic wrap. The polish brush that comes inside the bottle can also be used for basic color blocking, tips, and accent nails. The main difference is control. Professional tools may make some details easier, but they are not required for beginner designs. For best results, choose designs that match the items you have and avoid tiny details that need advanced precision.
3. How do I make dots on nails without a dotting tool?
You can make dots with a toothpick, bobby pin, or the rounded end of a small object. Place a little nail polish on a piece of foil or plastic, dip the tip lightly into the polish, and touch it gently onto the nail. A toothpick creates smaller dots, while a bobby pin usually creates larger ones. Try to use the same amount of polish for each dot so the pattern looks even. Let the dots dry before applying top coat, because brushing over wet dots can smear the design.
4. How long should I wait between nail polish layers?
It is best to wait until each layer feels mostly dry before applying the next one. The exact time depends on the polish formula, the thickness of the coat, and the room temperature. Thin coats dry faster and usually look smoother than thick coats. If you add tape, dots, or another color too soon, the base layer may lift, wrinkle, or smear. A practical rule is to use thin layers and wait a few minutes between coats. For tape designs, wait longer because the base must be fully dry before tape touches it.
5. Why does my nail polish bubble at home?
Nail polish can bubble when the coats are too thick, the bottle was shaken too hard, or the nail surface has oil or moisture on it. Painting in a very warm room or applying a new layer before the previous one settles can also cause bubbles. To reduce this problem, roll the bottle gently between your hands instead of shaking it, clean the nail surface before painting, and apply thin coats. If bubbles appear often, check whether the polish has become old, thick, or stringy, because that can also affect the finish.
6. Can short nails have simple nail designs?
Yes, short nails can look great with simple nail designs. In many cases, minimal designs look especially clean on short nails because they do not overcrowd the small surface. Good options include tiny dots near the cuticle, a single accent nail, thin diagonal tips, soft glitter at the edge, or one small heart. Avoid designs with too many colors or large shapes, because they can make short nails look visually smaller. A soft square or rounded shape can also help the manicure look neat and balanced.
7. What colors are best for beginner nail designs?
Beginner nail designs are usually easier with colors that are forgiving. Nude, beige, pale pink, soft gray, milky white, and sheer shades can hide small mistakes better than very dark or very bright colors. If you want contrast, add small details in white, black, gold, silver, or a deeper version of your base color. For a simple look, use two colors instead of many. A clean color combination makes even basic designs look more polished and reduces the chance of the manicure looking messy.
8. How do I clean nail polish around my skin?
Use a cotton swab lightly dipped in nail polish remover to clean around the nail edges. The swab should be damp, not dripping. If too much remover touches the nail, it can damage the polish you just applied. For smaller cleanup, you can wrap a tiny bit of cotton around the end of a toothpick, but be gentle and avoid scratching the skin. It is easier to clean mistakes before the polish fully hardens. Resting your hand on a flat surface while painting can also reduce cleanup.
9. Do I really need a base coat and top coat?
Base coat and top coat are strongly recommended if you want a cleaner and longer-lasting manicure. Base coat helps protect the natural nail and can reduce staining, especially when using dark or highly pigmented polish. Top coat seals the color and design, adds shine, and helps prevent early chipping. You can still paint your nails without them, but the result may not last as long. For simple nail designs, top coat is especially useful because it helps protect dots, tips, glitter, and other small details.
10. Why does my nail design smear when I apply top coat?
Nail designs usually smear under top coat because the details are still wet or because the brush presses too hard against the nail. Dots, lines, and small shapes need time to dry before sealing. When applying top coat, use a light touch and enough product on the brush so it glides over the nail instead of dragging across the design. Try not to go over the same area repeatedly. If the design is detailed, waiting longer before top coat can make a noticeable difference.
11. Can I use tape for nail designs?
Yes, tape can help create straight lines, diagonal tips, and color-blocked designs. The most important rule is to let the base polish dry completely before applying tape. If the polish is still soft, the tape can pull it off and leave a rough surface. Press the tape gently, paint the exposed area with a thin layer, and remove the tape carefully while the second color is still slightly wet. Avoid using very sticky tape if your polish is delicate, because it may lift the base color.
12. How can I make a home manicure last longer?
To make a home manicure last longer, start with clean, dry nails and apply thin layers of polish. Use a base coat, two thin coats of color if needed, and a top coat after the design has dried. Seal the free edge of the nail by lightly brushing polish across the tip. Avoid using your nails to open packages or scrape surfaces. Wearing gloves while cleaning or washing dishes can also help protect the manicure. If the shine fades after a few days, a fresh thin layer of top coat may refresh the look.
13. What should I do if I make a mistake while painting?
If you make a small mistake, clean it with a cotton swab and a little remover before the polish fully dries. If the mistake is on the nail surface, you can sometimes cover it with a dot, glitter accent, or small design detail. For larger smudges, it may be better to remove polish from that nail and repaint it instead of trying to fix too many layers. Beginners often get better results by choosing designs that allow small corrections, such as accent nails, glitter tips, and dot patterns.
14. When should I avoid doing nail designs at home?
You should avoid doing nail designs at home if your nails are painful, lifting, cracked deeply, bleeding, or surrounded by irritated skin. It is also better not to cover unusual discoloration or possible infection signs with polish, because that can hide a problem that needs attention. If you have gel, acrylic, or extensions that need removal, do not force them off. Incorrect removal can weaken the natural nail. In these situations, a qualified nail professional or healthcare professional may be the safer choice.
Editorial note: This article is for educational and general beauty guidance only. Nail products can affect people differently, so check product labels, avoid contact with irritated skin, and seek qualified help if you notice pain, nail damage, or signs of infection.

Nora Ashford is a licensed nail technician and beauty educator with over 12 years of hands-on experience in professional nail care, product formulation, and salon hygiene. She began her career working in high-end nail studios across London and New York before transitioning into content creation to help people make informed, safe choices about their nail health and beauty routines.
Her work focuses on translating complex nail science into practical, easy-to-follow advice. She regularly reviews nail products, tests application techniques, and shares evidence-based tips on everything from cuticle care to gel safety.
Nora believes that beautiful nails should never come at the cost of nail health, and she is committed to helping readers achieve salon-quality results responsibly.